A photography gear checkout checklist should confirm the project, assigned crew member, camera bodies, lenses, lighting, stands, modifiers, batteries, chargers, memory cards, tethering gear, grip equipment, cases, and accessories before any item leaves storage. Each item should have a recorded condition, checkout time, assigned person or project, expected return time, and return inspection. Location shoots also need transport, weather protection, power, backup, and packing checks.
A gear list tells your team what the shoot needs. It does not confirm that the equipment is available, complete, working, packed, or assigned to the right person.
A camera body may appear on the shoot list while it remains checked out to another photographer. A lighting kit may be in storage but missing a trigger or power cable. A lens may be booked for a second project later the same day. A case can leave the studio without anyone recording who took it or when it should return.
StudioHero helps photography studios control those movements through equipment records, barcodes, kits, assignments, storage locations, checkout logs, maintenance history, and availability status. Our photography studio management software connects gear with the people, projects, rooms, and shoot dates that depend on it.
A proper photography gear checkout process should answer these questions before release:
- Is this the correct equipment for the approved shoot?
- Is every item available for the full booking period?
- Does each item work?
- Are all required accessories included?
- Who is accepting responsibility for the gear?
- Where is the equipment going?
- When should it return?
- What condition was it in before checkout?
- What condition was it in after return?
- Where should it be stored next?
Start With the Approved Shoot Requirements
Do not begin by pulling the photographer’s usual kit from the shelf.
Review the project record, shoot brief, shot list, room plan, crew assignments, and location details first. The gear checkout should match the actual production, not habit.
Confirm:
- Client and project name
- Shoot date
- Studio room or location
- Crew call time
- Equipment preparation time
- Expected checkout time
- Expected return time
- Assigned photographer
- Person responsible for the equipment
- Camera requirements
- Lighting plan
- Tethering and storage needs
- Backup requirements
- Client supplied equipment
- Rented equipment
A studio product shoot may need a different kit from a fashion campaign, even when the same photographer handles both. The product shoot may depend on a macro lens, tabletop surfaces, overhead support, tethering, and a color accurate monitor. The fashion shoot may need faster lighting changes, full length backdrops, wardrobe support, and more grip equipment.
The equipment list should reflect those differences.
Confirm Equipment Availability Before Preparation
A required item should not move into preparation until your team confirms that it is available.
Check whether each item:
- Appears in the equipment database
- Sits in the expected storage location
- Is not assigned to another project
- Is not checked out to another person
- Is not reserved later during the expected usage period
- Is not blocked for maintenance
- Is not waiting for inspection
- Has all required parts
- Can return in time for the next confirmed booking
A physical item sitting on a shelf does not always mean it is available. Another coordinator may already have reserved it for a later shoot.
StudioHero’s equipment tracking software lets photography teams connect gear availability with project assignments, checkout records, maintenance status, and return times. This prevents staff from promising equipment based only on what they can see in storage.
Availability checks also protect the wider studio calendar. Your team should not confirm two shoots that depend on the same camera package, lighting kit, or tethering station.
Camera Body Checkout Checklist
Inspect every camera body before release.
Check:
- Correct camera body for the shoot
- Asset name
- Serial number
- Barcode
- Body condition
- Sensor condition
- Battery compartment
- Card slots
- Hot shoe
- Cable ports
- Buttons and control dials
- Viewfinder or display
- Body cap
- Camera strap
- Required plate or cage
- Date and time settings
- Image format settings
- Backup body where required
Do not apply the same settings to every project. File format, color settings, frame size, synchronization, and capture method depend on the production brief.
Record scratches, dents, loose covers, damaged screens, or other visible issues before checkout. That gives the return inspector a clear condition reference.
Lens Checkout Checklist
A lens should match the camera mount, shot requirements, and planned working distance.
Check:
- Required focal length
- Lens mount
- Front element
- Rear element
- Focus ring
- Zoom ring
- Aperture operation
- Stabilization where available
- Autofocus operation where required
- Lens hood
- Front cap
- Rear cap
- Filter
- Collar or support foot
- Protective pouch or case
- Existing marks or damage
Inspect the glass under proper light. Dust, smudges, loose mounts, or damaged threads can affect the shoot or create delays during setup.
Return the lens to its case after inspection rather than leaving it loose with the rest of the kit.
Battery, Power, and Charging Checklist
Power problems can stop both studio and location work.
Check:
- Charged camera batteries
- Spare camera batteries
- Lighting batteries
- Laptop battery
- Monitor battery
- Battery chargers
- Charger cables
- Camera power adapters
- Lighting power cables
- Extension cables
- Power strips
- Plug adapters
- Tethering power
- Portable power for location work
- Battery labels
- Battery count
The number of batteries depends on the equipment, shoot length, weather, access to power, and expected capture volume. Avoid fixed packing rules that ignore the production.
Count batteries before checkout and again during return. A kit should not be marked complete because the case came back.
Memory, Storage, and Tethering Checklist
Media and tethering equipment often involve many small parts. Missing one cable or adapter can leave the rest of the setup unusable.
Check:
- Approved memory cards
- Correct card type
- Card capacity
- Card condition
- Card reader
- Tethering cable
- Spare tethering cable
- Cable support
- Laptop
- Laptop charger
- External drive
- Backup drive
- Monitor
- Monitor cable
- USB adapters
- Display adapters
- Dock or hub
- Protective cases
Formatting cards or deleting files should follow the studio’s approved media process. Equipment staff should not erase media simply because a card has returned with a kit.
Keep storage media assigned to the project until the team confirms that files have been transferred and backed up correctly.
Lighting Equipment Checkout Checklist
Lighting kits should be checked as complete working systems.
Check:
- Strobe heads
- Continuous lights
- Power supplies
- Flash tubes or bulbs
- Triggers
- Receivers
- Sync cables
- Power cables
- Battery packs
- Light stands
- Boom arms
- Softboxes
- Speed rings
- Umbrellas
- Reflectors
- Grids
- Barn doors
- Flags
- Diffusion
- Sandbags
- Mounting hardware
- Protective covers
- Cases
A softbox is not ready if its rods or speed ring are missing. A trigger set is not ready if the receiver uses a different connection. A battery light is not ready if the battery has not been charged.
Build the checklist around complete working combinations, not individual item names.
Grip, Support, and Protection Checklist
Grip equipment supports camera position, lighting, backdrops, safety, and cable control.
Check:
- Tripods
- Tripod heads
- Tripod plates
- C stands
- Arms
- Grip heads
- Clamps
- Super clamps
- Boom supports
- Apple boxes
- Sandbags
- Safety cables
- Cable covers
- Floor protection
- Tape
- Basic tools
- Step ladders where required
- Equipment carts
- Protective blankets
- Cases
Small parts cause many checkout failures. A tripod without its plate or a clamp without the correct adapter may be useless during the shoot.
Pack related parts together and identify which kit they belong to.
Background, Set, and Styling Checklist
Backgrounds and styling equipment may sit outside the main gear room, which makes them easy to miss.
Check:
- Backdrop rolls
- Backdrop stands
- Crossbars
- Clamps
- Sweep condition
- Shooting surfaces
- Product tables
- Turntables where required
- Props
- Furniture
- Garment racks
- Hangers
- Steamers
- Styling kits
- Cleaning materials
- Protective covers
- Paper or fabric quantities
- Consumables
Reusable equipment and consumables need different records.
A backdrop support can return to storage and remain available for another shoot. Tape, paper, wipes, batteries, gels, and cleaning materials may need a quantity update or replacement.
StudioHero’s inventory management software helps studios track asset records, storage locations, expendables, reserved quantities, stock levels, and reorder needs.
Build Equipment Kits Around Real Shoot Work
Photography studios can reduce preparation errors by grouping items that regularly move together.
Useful kit types include:
- Camera kit
- Lens kit
- Lighting kit
- Tethering kit
- Product photography kit
- Portrait kit
- Location kit
- Grip kit
- Styling kit
- Backup kit
Each kit should have:
- A kit name
- A standard contents list
- A barcode or identifier
- A storage location
- Individual asset records where needed
- A condition record
- An assigned project
- An assigned person
- An expected return time
- A return checklist
StudioHero supports equipment kits and bundles, which lets teams assign grouped items to a shoot and check them back in together. Individual records still matter for high value or serialized assets.
Add Location Shoot Checks
Location work requires extra planning because gear leaves the controlled studio environment.
Check:
- Destination
- Travel time
- Vehicle capacity
- Loading order
- Transport cases
- Weather protection
- Power access
- Cable length
- Portable power
- Backup camera
- Backup media
- Backup lighting option
- Security arrangements
- Onsite contact
- Equipment access times
- Packing owner
- Return schedule
- Vehicle unload responsibility
- Temporary storage onsite
- Any production permits handled by the client or crew
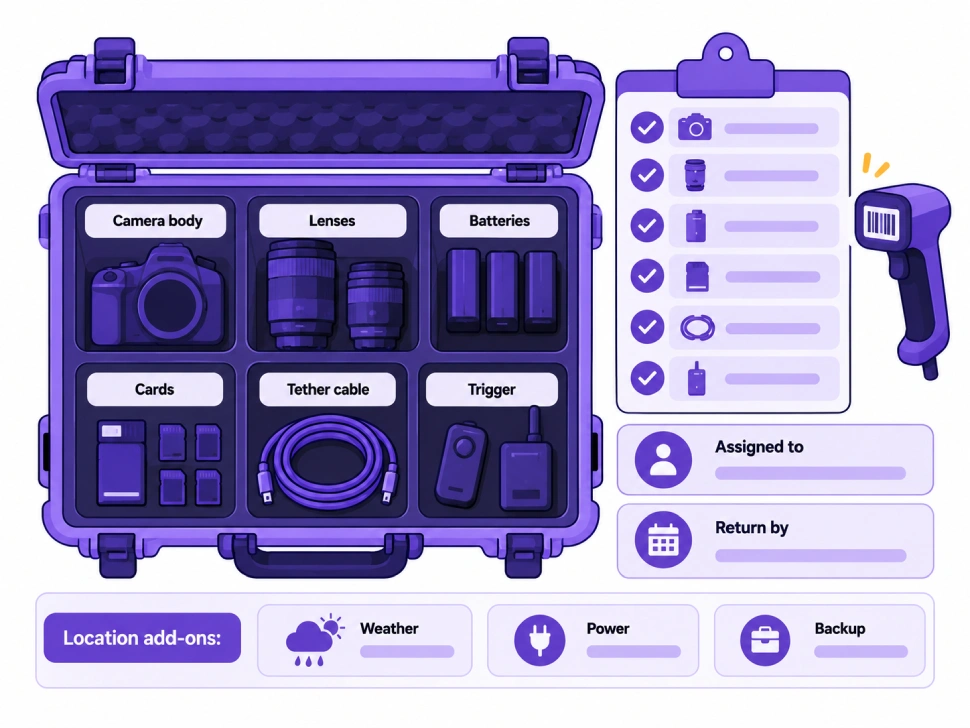
The equipment team should know what will travel, how it will travel, and who will control it after arrival.
Pack items according to setup order where practical. Gear needed first should not sit under unrelated cases at the back of the vehicle.
Assign Responsibility to One Identifiable Person
Every checkout needs an assigned person.
Avoid records such as “camera team” or “location crew.” Those labels do not identify who accepted the equipment or who should report a problem.
Record:
- Crew member name
- Project
- Destination
- Checkout date and time
- Expected return
- Equipment condition
- Included accessories
- Person approving release
- Notes about rented equipment
- Notes about client supplied equipment
The assigned person may not carry every case personally, but they should know which equipment the team received and when it must return.
Informal handoffs create missing accessories, uncertain ownership, and incomplete return records. The article on shared equipment tracking mistakes explains how weak handoffs affect accountability across creative teams.
Scan and Record the Checkout
Barcode scanning reduces manual entry and creates a clearer record of each movement.
Before release:
- Scan individual assets
- Scan complete kits
- Confirm quantities
- Confirm the assigned project
- Confirm the assigned person
- Confirm the destination
- Record checkout time
- Record expected return
- Add condition notes
- Confirm storage locations have been updated
StudioHero supports barcode based check in and check out, equipment assignments, kits, storage locations, and usage records. These functions help studios track where equipment moved without relying on handwritten notes.
The wider guide to equipment management, tracking, and maintenance explains how checkout records connect with service history, availability, and longer term equipment control.
Complete a Final Pack Check
Before the equipment leaves, compare five records:
- Approved shoot requirements
- Reserved equipment list
- Prepared equipment
- Scanned checkout record
- Packed cases
Open each case and compare its contents with the kit list.
Check small items separately, including batteries, chargers, cards, cables, triggers, plates, caps, adapters, and mounting hardware. These parts are easier to miss than camera bodies or lighting heads.
The final checker should record that the review happened. Do not rely on memory or assume that another team member already checked the case.
Photography Gear Return Checklist
The checkout process does not end when the equipment comes back through the studio door.
Complete these steps:
- Record the return time.
- Scan every returned item.
- Compare returned quantities with the checkout record.
- Open and inspect every case.
- Check camera body condition.
- Inspect lenses.
- Count batteries.
- Count chargers.
- Count cards.
- Count cables and adapters.
- Check lighting equipment.
- Check grip equipment.
- Confirm all kit parts have returned.
- Record missing items.
- Record visible damage.
- Mark items that need cleaning.
- Mark equipment that needs repair or inspection.
- Block damaged equipment from future bookings.
- Return usable equipment to its assigned storage location.
- Close the checkout only after inspection.
A returned case does not prove that its contents are complete.
Late, missing, or damaged equipment can also affect upcoming shoots. Review future reservations before the next crew discovers that a required item is unavailable.
The guide to equipment tracking problems creative studios face daily covers the operational problems caused by missing gear records, delayed returns, and unclear responsibility.
Handle Missing or Damaged Equipment Immediately
When something is missing or damaged:
- Record the equipment item.
- Link the issue to the project.
- Record who returned the kit.
- Describe the visible damage.
- Add photographs where your process requires them.
- Check cases, vehicles, rooms, and the location.
- Mark the item unavailable where necessary.
- Assign a person to follow up.
- Update the maintenance record.
- Review upcoming bookings that depend on the item.
Do not return damaged equipment to available status because the repair decision has not been made yet.
StudioHero’s studio equipment management software connects equipment records with availability, maintenance history, projects, storage, and operational reporting.
Studio and Location Gear Checkout Checklist
| Checkout Stage | Item or Check | Studio Shoot | Location Shoot | Record Required |
| Shoot details | Client, project, date, and assigned crew | Yes | Yes | Project assignment |
| Scheduling | Checkout and return period | Yes | Yes | Checkout record |
| Camera bodies | Body, serial number, condition, cap, strap | Yes | Yes | Asset and condition record |
| Lenses | Mount, glass, rings, caps, hood, case | Yes | Yes | Asset and condition record |
| Batteries | Charged batteries, spares, labels, count | Yes | Yes | Quantity record |
| Power | Chargers, cables, adapters, extensions | Yes | Yes | Kit contents |
| Media | Cards, readers, drives, and backup media | Yes | Yes | Project assignment |
| Tethering | Laptop, cables, adapters, monitor, power | Conditional | Conditional | Kit record |
| Lighting | Heads, power, triggers, stands, modifiers | Conditional | Conditional | Asset or kit record |
| Grip | Tripods, plates, clamps, sandbags, supports | Conditional | Conditional | Kit contents |
| Backgrounds | Rolls, stands, clamps, surfaces, props | Conditional | Conditional | Asset or inventory record |
| Consumables | Tape, gels, wipes, paper, batteries | Conditional | Conditional | Quantity update |
| Protection | Cases, covers, floor protection | Conditional | Yes | Kit contents |
| Transport | Vehicle space, loading order, case count | No | Yes | Transport notes |
| Weather | Covers and environmental protection | No | Conditional | Location notes |
| Power access | Outlets, cable length, portable power | Conditional | Yes | Location notes |
| Backup gear | Spare body, media, light, or power | Conditional | Yes | Equipment reservation |
| Assignment | Named crew member accepting the gear | Yes | Yes | Assigned person |
| Checkout | Barcode scan, time, destination, condition | Yes | Yes | Checkout log |
| Return | Scan, quantity check, and case inspection | Yes | Yes | Return log |
| Condition | Damage, missing parts, and cleaning need | Yes | Yes | Condition report |
| Maintenance | Repair, inspection, or unavailable status | Conditional | Conditional | Maintenance record |
| Storage | Correct room, shelf, case, or kit location | Yes | Yes | Storage location |
Use Equipment Records to Guide Future Decisions
Checkout history can show which gear receives frequent use, which kits return incomplete, and which items spend too much time unavailable.
The equipment utilization calculator can help photography studios compare equipment availability with actual usage. This gives managers a clearer basis for rental, purchase, maintenance, and replacement discussions.
The equipment ROI calculator can support a separate financial review when the studio needs to compare ownership costs with revenue or usage.
These tools do not replace accurate checkout records. Their output depends on the quality of the underlying equipment and usage data.
End Every Checkout With a Complete Return
A photography gear checkout is not finished when the cases leave storage. It ends after every item returns, passes inspection, receives the correct status, and goes back to the right location.
A written checklist reduces missed accessories and rushed packing. A connected equipment system adds assignment, availability, condition, maintenance, usage, and return accountability.
StudioHero keeps photography equipment tied to projects, people, locations, kits, service records, and future bookings. Your team can see what is available, what is checked out, who has it, and what needs attention before the next shoot.
Book a StudioHero demo to see how your studio can manage photography equipment checkouts, returns, kits, barcodes, and maintenance records in one system.
SEO Block
| Field | Details |
| SEO Title | Photography Gear Checkout Checklist for Every Shoot |
| Meta Description | Use this photography gear checkout checklist to inspect, assign, pack, track, return, and record equipment for studio and location shoots. |
| Primary Keyword | photography gear checkout checklist |
| Content Slug | photography-gear-checkout-checklist |